ERHALTEN SIE SOZIAL MIT UNS
AKTUELLE ARTIKEL


Newsletter
Bleiben Sie über die neuesten Werbeaktionen, Neuigkeiten und Veröffentlichungen auf dem Laufenden!
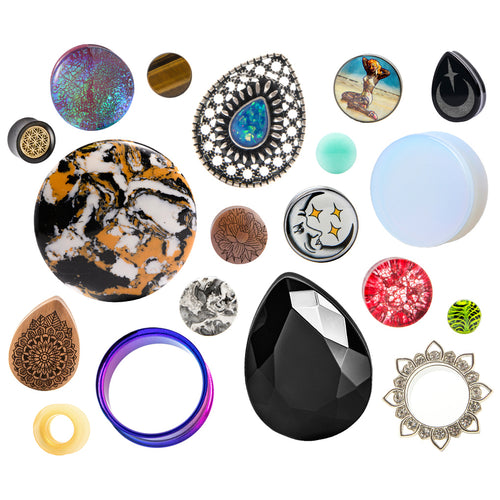
Design Your Own Plug: The Ultimate Custom Plugs Experience
Have you ever dreamed of wearing a piece of jewellery that’s uniquely yours, with no one else in the world having exactly the same one? With Custom Plugs’ Make Your Own Plug collection, that dream becomes reality. This blog will take you through the creative process, material options, design tips, ordering guidance, and care advice. Let your imagination run free, and wear your personality in your ears.

What Is “Make Your Own Plug”?
The Make Your Own Plug feature lets you design a custom plug or tunnel from scratch. Rather than picking a pre-made design, you get to decide:
- The base material (wood, acrylic, metal, etc.)
- The shape (round, teardrop, double-flare, single-flare, etc.)
- The artwork or image (photos, logos, patterns, text)
- The finishing touches (glossy finish, matte, edge colours)
- The size/gauge and stretch compatibility
It’s like having your own plug workshop - but done online!
Why Go Custom? The Benefits
One-of-a-Kind Style
No more wearing the same design as thousands of others. When you customise your plug, you get something nobody else has: your image, your style, your vibe.
Perfect Fit
You can choose the exact gauge, flare type and dimensions to suit your healed piercing. No guesswork, no settling.
Gift-Worthy
Custom plugs make unforgettable gifts; birthdays, anniversaries, significant stretches. The personal touch means more than off-the-shelf jewellery.
Creative Freedom
Want your initials in Celtic script, a photo of your cat, or a galaxy swirl? Go ahead. With custom design, your inspiration sets the limit.

How It Works: Step by Step
Step 1: Choose Your Base
We stock a variety of wood and glass options to choose from.
Step 2: Select Shape & Flare
Pick the shape (round, teardrop, or saddle) and flare style (double-flare, single-flare, or no flare). Your design determines what’s most practical. For example, complex artwork might show better on a flat surface.
Step 3: Upload or Create Artwork
Here’s where the real fun starts. Upload a high-resolution image. Make sure the artwork is crisp, you don’t want pixelation at ear size.
Step 4: Finalise & Order
Once satisfied, choose your gauge size and quantity, then submit your order. The workshop will produce your custom plug, imprint your design, finish, and ship.
Design Tips & Best Practices
Use high-resolution images (300 dpi or higher) to avoid blurriness. Avoid text near edges, trimming safety margins helps prevent design loss.
Contrast is key, dark images on light backgrounds (or vice versa) help your design pop.
Test with mock-ups, use preview tools to check orientation before ordering.
Stick with healed piercings, don’t order custom plugs for fresh or healing piercings unless specified as safe.
How to Care for Your Custom Plug
Your custom plug deserves the same care as any high-quality jewellery: Clean Regularly: use saline solution or mild, fragrance-free soap (materials matter).
Avoid Extreme Moisture on Organics: wood or porous materials should not soak.
Store Properly: keep them separate from other metal items to avoid scratches.
Inspect for Wear: check for chips, peeling, or image fading over time.
Final Thoughts
Designing your own plug isn’t just a fun novelty, it’s an opportunity to wear your personality, memory, or artwork. From meaningful images to bold colours, you get to be both creator and wearer.
If you’re ready to bring your vision to life, visit our Make Your Own Plug collection at Custom Plugs, follow the steps above, and let your ears tell your story.
Get started today - browse our range of customisable plugs.
BESTSELLER

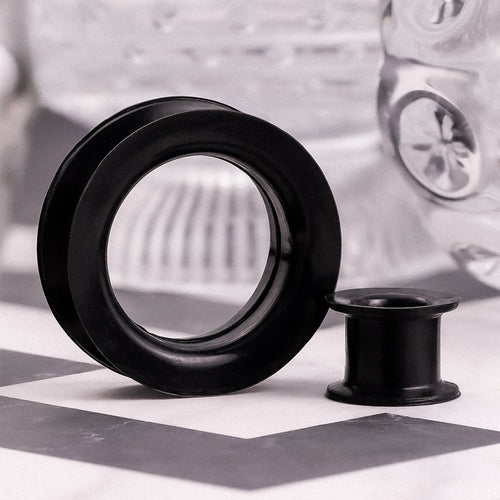
Schwarzer Silikon-Ohr-Tunnel
ab
£3.00
-v1657710003014.jpg?512x640&transform=resize=350)
Schwarzer Double-Flared-Tunnel aus Edelstahl
ab
£7.00
Klar & Schwarz Single Flare Glas Plug / Gauge
ab
£5.00

Opalitglas Plug / Messgerät
ab
£6.00

Blaue & grüne irisierende Glas-Ohr-Tunnel
ab
£11.00

Marmor Schwarz & Roter Stein Plug / Messgerät
ab
£9.00

Amethyst Stein Tunnel
ab
£8.00
Schwarzes Metall-Dead-Stretching-Set
ab
£15.99
NEU

Neongrüner & Schwarzer Silikon-Ohrtunnel in Marmoroptik
ab
£6.00
NEU


Clear & Schwarzes Glas-Dead-Stretching-Set
ab
£15.99
NEU